Blogger Widgets
Showing posts with label stabilizer. Show all posts

Friday, September 25, 2015

The NEW Nebula 4200 5-Axis Digital Gyroscope Stabilizer

Nebula 4200 5-axis digital gyroscope stabilizer

Recently Filmpower Inc. announced the Nebula 4200 stabilizer that will become available soon in three different versions. A pro, a lite and a 5 -axis Nebula 4200. Just a few weeks ago, I wrote a review about its predecessor, the Nebula 4000 3-axis stabilizer and included a few pointers on how to use the software to try and get the most out of this already great product. I've been more then pleased with the performance of the Nebula 4000 and was able to capture some incredible smooth footage with it.


The Lite version will be somewhat similar to the Nebula 4000 but this time it will have a more stable platform to stand on and you can balance your camera on it without the need of tools in just three minutes. That's a major upgrade since it can be kind of a hassle with the Nebula 4000 sometimes. And I'm not sure, but it looks like it would be possible to upgrade the lite version to a pro or a 5-axis version through a quick-release system below the yaw motor. Unfortunately I haven't been able to confirm this yet. The pro version requires two handed operation, which will make it possible to work with heavier cameras. The maximum payload will be 1.6 kg / 3.4 lbs for all versions. Now, the 5-axis version seems to be a real special one:

Monday, April 6, 2015

REVIEW: Nebula 4000 Lite 3-Axis Gyroscope Stabilizer

Sony A7s on the Nebula 4000 Lite 3-axis gyroscope stabilizer
Introduction

Last week I received my Nebula 4000 Lite from Camera Motion Research. This is a 3-Axis gyroscope stabilizer from FilmPower that I've been really interested in. A few months ago I saw a video online of someone (test) flying a Sony A7s in front of mirrors and I could hardly believe it was real. A MōVI / Ronin like device, only a lot smaller, single handed operation, lightweight and affordable. About two years ago the first (noticeable) handheld gyro-stabilizer was introduced and it took the market by storm. With this device you were able to get Steadicam like shots, only it's all relying on electronics instead of "analog" balance. It makes it very easy to get nice moving shots with your camera, even when you're working in unfriendly Steadicam conditions. It enables you to get even more creative shots and it doesn't take months or even years of training to be able to use it properly. Now, only two years later, we can get all of this great technology in a small and lightweight device that you can easily carry around with you. It's incredible to see how fast things are changing in the world of filmmakers.

Ah yes, filming in the old days. Much simpeler times...
The Nebula 4000 Lite can be used with cameras weighing up to 1KG / 2LB, making it the perfect companion for your Panasonic GH4, Sony A7s and similar sized cameras. They even include a special mount which will help fly your smartphone on the Nebula. It also comes with a nice custom case with strap, charger and a battery that has been fitted inside the handle. The Nebula only weighs 800 grams which is virtually nothing.

Friday, January 17, 2014

REVIEW - Radian Pro Wireless HD Video

Radian Pro Wireless HDMI Video From Camera Motion Research
Radian Pro Wireless HD Video From Camera Motion Research

A few weeks ago Camera Motion Research, the manufacturer of the critically acclaimed Blackbird stabilizer (review here), launched their professional wireless HD video set for the US market and now they also made a version available for Europe! I've had the great opportunity to try it out the last couple of days and I'm happy to be able to share my experiences with you.

Radian Pro Wireless HD Video Set

The CMR Radian wireless HD video set is manufactured with Amimon WHDI professional quality chip sets for best uncompressed resolutions and frame rates up to full 1080P(60). The system has near zero latency and line-of-sight range of over 300 feet (90 meters)! A connection between the Radian transmitter and receiver is established in just a few seconds and it automatically selects the best channel to use. Even if you have never used a wireless system before, you will be up and running in no-time.

Here's a quick video showing how long it takes for the Radian Pro wireless video system to link the transmitter to the receiver. A longer video demonstration with the system in action will be added at a later point in time.


The Radian system is available in two flavours. The Radian Pro unicast for connecting one transmitter to one receiver and the Radian MC multicast for connecting one transmitter to up to 4 receivers simultaneously. The one I'm reviewing here is the unicast version. The system is shipped with many different parts. You'll receive HDMI and USB power cables, remote, power adapter and of course the Radian transmitter and receiver. All perfectly packed with a quick start guide. In order to be able to use the system you will need some kind of power and mounting solution for your camera and monitor, and that's what we're going to discuss now. So please take some time to (re)fill your favourite coffee mug and I'll wait here for you to return.

Thursday, October 24, 2013

Wireless HD Video From CMR

Radian Wireless HD Video From CMR
Camera Motion Research, the company from North Carolina that brought us the Blackbird stabiliser, has added a very interesting new product to their line up. The CMR Radian wireless HD video set. Manufactured with Amimon WHDI professional quality chip sets for best uncompressed resolutions and frame rates up to full 1080P(60), near zero latency, and line-of-sight range over 300 feet!

Thursday, July 12, 2012

Steadicam Merlin Arm & Vest with the Blackbird Stabilizer

Blackbird stabilizer on the Steadicam Merlin arm and vest

Today I received a package with something very handy inside!

It's the Z-post from Camera Motion Research to use the Blackbird Stabilizer (which I reviewed a few days ago) on the Steadicam Merlin arm and vest! Let's have a closer look at it.

Saturday, July 7, 2012

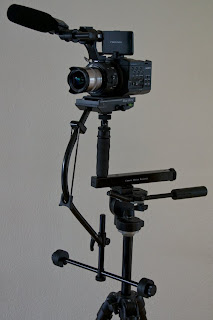
Balancing the NEX-FS100 on the Blackbird Stabilizer

Click here for more information about the Blackbird stabilizerClick here for more information about the Blackbird stabilizer
NEX-FS100 balanced on the Blackbird (with the short and standard vertical bar)

When you have a stabilizer, I always think it's a good idea to share a good setup, once you found one for your particular camera. In my case it's the Sony NEX-FS100 with 16mm f2.8 pancake lens and VCL-ECU1 ultra wide converter. That's why today, I want to share with you my Blackbird stabilizer setup.

Thursday, June 28, 2012

Review: Blackbird Camera Stabilizer

Click here for more information about the Blackbird Camera Stabilizer
The Blackbird Full Kit after unpacking everything
A few days ago I was asked by Camera Motion Research if I would like to try out their Blackbird Camera Stabilizer. A fantastic offer I just couldn't refuse, being the camera stabilizer fanatic that I am! And before I knew it, UPS came to my door and delivered the Blackbird.

Wednesday, June 27, 2012

Balancing the NEX-FS100 on the Glidecam HD-2000

Click here for more information about the Glidecam HD-2000
NEX-FS100 on a balanced Glidecam HD-2000

I've received a lot of questions about the Glidecam setup I use for my camera. That's why I'm posting them here, so you can give it a try too!

Thursday, May 31, 2012

Glidecam HD-2000 Review and Videos!


Click here for more information about the Glidecam HD-2000
Glidecam HD-2000 and the Glidecam forearm support brace

About two weeks ago I received a package with the Glidecam HD-2000 inside to 'test drive' and review. Now a few days later, I'm already addicted to this stabilizer!

Balance and setup
Setting up the Glidecam HD-2000 for the first time was an absolute breeze. The first thing I did, was mounting the camera (Sony NEX-FS100 with the 16mm f2.8 pancake lens and ultra wide converter and a smaller NP-F770 battery, without the side handle attached to the camera) on a Manfrotto (MN-357) Sliding Plate Adapter. Then I tried to find the center of gravity and marked the spot underneath the sliding plate. This spot should roughly be placed on top the central post. You do this by attaching your camera (or in my case with sliding plate adapter attached) to the quick release plate of the HD-2000. After that, you can start the balance process. I started out with the side handle attached to the camera and used 3 counter weight plates on each side of the Glidecam. By telescoping the base platform in and out I got the right drop time and was able to fly the camera within minutes after unboxing everything.

Saturday, May 19, 2012

Glidecam HD-2000 Camera Stabilizer

Click here for more information about the Glidecam HD-2000
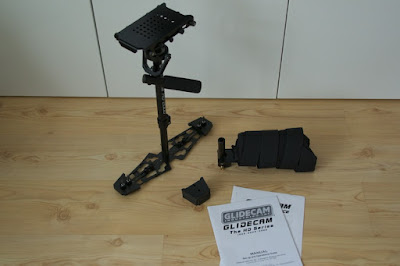
Unboxing the Glidecam HD-2000 camera stabilizer and Glidecam Forearm Support Brace

Today I received a package from A.F. Marcotec with something really cool inside. It's a camera stabilizing system: the Glidecam HD-2000 with the Glidecam Forearm Support Brace. Thanks to Thomas Howie, Vice President of Sales & Marketing from Glidecam and René Shoukier from A.F. Marcotec, I'm able to 'test drive' this camera stabilizer for a couple of days!

Wednesday, January 25, 2012

The New Steadicam Merlin 2

Video of the Steadicam Merlin 2 in action

Tiffen unveiled their brand-new Steadicam Merlin 2 camera stabilizer system at CES 2012 earlier this year. It looks a lot like the original Steadicam Merlin, but it's more robust and has some functional refinements.

Saturday, November 26, 2011

Balancing the NEX-FS100 on the Steadicam Merlin

The last few weeks I received a lot of questions about the two Steadicam videos you can see below. One of them was if I used the Steadicam Merlin Arm & Vest - which I did not use for these videos - and the other one was which setup I used for the Steadicam Merlin.

Please note: I haven't been able to fly the new Steadicam Merlin 2 myself with the FS100, but I think these settings will also apply for the new version.

This is why I decided to post them here and hopefully give you a good starting point in balancing your Sony NEX-FS100 on the Merlin. It's very important to use these settings in combination with the camera configuration I've used. If you use a different lens or even an other battery, it can throw of your balance completely and you might nog be able to balance it properly, using these settings.

Friday, October 21, 2011

Autumn Forrest - NEX-FS100 & Steadicam Merlin

I've made a new short film with the NEX-FS100 on the Steadicam Merlin.
It's called "Autumn Forest" and yes, I came up with the title! What... you don't like it? Alright, specially for you I have another title: "Lots and Lots of Leaves on the Ground".


The lens I used on the Sony NEX-FS100 is the E-mount 16mm F2.8 pancake lens (SEL1628) with the Ultra Wide converter (VCL-ECU1). I bought this lens specifically for the Steadicam, because of the auto iris and focus. Which isn't a luxury at all when you consider that you'll need both hands to operate the Steadicam.

Monday, October 10, 2011

Steadicam Merlin vs Steadicam Pilot

I came across these two video's.
The cool thing about it is that two Steadicam operators had an offline meeting on a great location (shikinomori Park) with their Steadicams. One brought his Steadicam Merlin with him and the other his Steadicam Pilot. They both made a video from their meeting and placed it on YouTube.


They both are great Steadicam operators and it's nice to see these two Steadicams in action together.